
How Much Does a Failed NSPIRE Inspection Cost? A Complete Decision Guide for Property Owners
May 28, 2026
- By
- Reac Nspire Pros
- NSPIRE Compliance Specialists
How much should you budget if your property fails an NSPIRE inspection? At Reac Nspire Pros, we’ve been helping property owners navigate failed inspections for years of experience, and we’ve seen how quickly costs can escalate when issues aren’t prioritized correctly. This guide breaks down what actually drives expenses so you can make informed decisions instead of reacting under pressure. For a broader overview of compliance expectations, visit our NSPIRE inspection preparation guide. We’ve seen owners assume a failed item is “minor,” only to discover that a simple GFCI issue revealed moisture intrusion behind a wall. That single defect triggered electrical repairs, drywall replacement, and mold remediation. The biggest misconception is that the inspection fee is the real cost. In reality, deferred maintenance, reinspection fees, and potential HUD enforcement actions are what strain budgets most.
Key codes and what happens if you ignore them
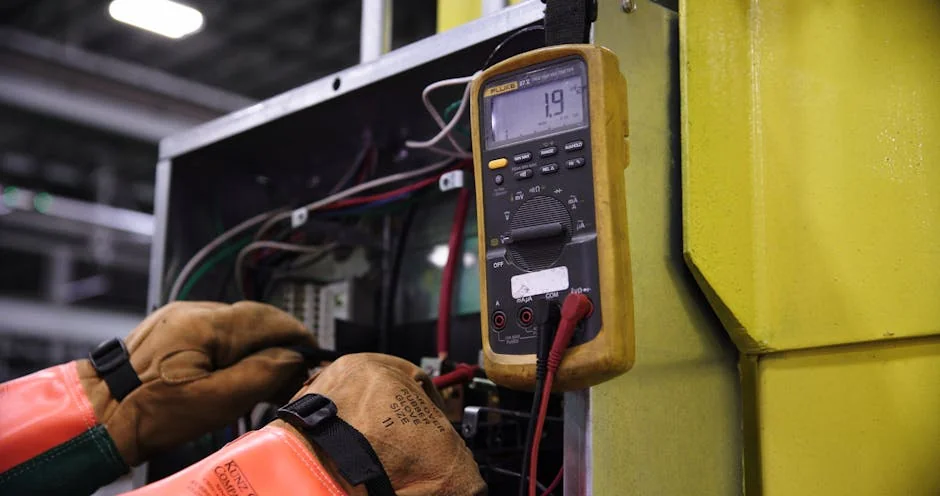
Passing an NSPIRE inspection requires more than cosmetic fixes. HUD expects documented, code-compliant corrections that align with nationally recognized safety standards. The most important best practice is to repair deficiencies according to the governing code – not just to make them look functional. Inspectors are trained to identify temporary or non-compliant fixes.
- HUD NSPIRE Standards (Current Version) – Establishes health and safety-based inspection criteria for HUD-assisted housing. Requires correction of life-threatening deficiencies within prescribed timeframes. Consequences include failed inspections, mandatory reinspection, potential abatement of subsidy, and enforcement actions.
- NFPA 72 National Fire Alarm and Signaling Code (Current Edition) – Governs installation and maintenance of smoke alarms and fire alarm systems. Non-compliance can result in life-safety violations, increased liability exposure, and automatic NSPIRE point deductions.
- NFPA 70 National Electrical Code (Current Edition) – Sets standards for electrical safety, including GFCI protection in wet locations. Violations may lead to failed inspections, fire hazards, insurance complications, and required licensed electrical corrections.

Questions to ask and what the remediation process looks like
A structured remediation plan prevents cost overruns. We recommend asking a qualified professional the following:
- Are deficiencies classified as life-threatening or non-life-threatening?
- Do repairs require licensed trades such as electricians or plumbers?
- Will permits and municipal inspections be required?
- What documentation should be retained for HUD?
- Site complexity and number of units affected
- Material costs and code-required upgrades
- Total scope of structural or system repairs
Get Clear Answers Before You Commit to Repairs
A failed NSPIRE inspection does not have to derail your property operations. The key is understanding which deficiencies carry the highest risk and addressing them with durable, code-compliant solutions. We help property owners prioritize repairs, coordinate licensed trades, document corrections, and prepare confidently for reinspection. If you’re evaluating repair bids or unsure whether a proposed fix will satisfy HUD standards, we can provide clarity before you commit funds. Our team focuses on long-term compliance, not quick patches that lead to repeat failures. The right guidance now can prevent enforcement actions, subsidy interruptions, and escalating repair costs later.

FAQs
What is typically the biggest expense after failing an NSPIRE inspection?
The largest expenses usually stem from deferred maintenance that affects structural elements or building systems. Roof failures, deteriorated stair assemblies, outdated electrical panels lacking required GFCI or AFCI protection, and plumbing leaks causing concealed water damage tend to drive costs higher than minor cosmetic issues. Life-threatening deficiencies identified under HUD’s NSPIRE standards must be corrected quickly, which can require expedited labor and licensed trades. We’ve seen properties where a failed smoke alarm led to a broader review of the entire fire alarm system. Once outdated wiring and missing interconnection were identified, the repair expanded beyond simple device replacement. The expense increases when multiple units are affected because work must be replicated across the property. Early detection and routine maintenance remain the most effective way to prevent large post-inspection repair bills.
How quickly do you have to fix NSPIRE deficiencies?
HUD classifies certain items as life-threatening deficiencies, and those typically must be addressed within a short, defined correction window. While specific timelines can vary by notice, the expectation is immediate action with documented proof of correction. Non-life-threatening items may allow a longer repair period, but delaying them increases the chance of reinspection failure. We recommend reviewing the inspection report line by line and categorizing items by severity. Document each repair with photos, invoices, and, when applicable, permit sign-offs. In our experience, organized documentation prevents disputes during reinspection. Waiting until the end of the correction period often leads to rushed work, higher labor premiums, and overlooked details that cost more to fix later.
How Much Does a Failed NSPIRE Inspection Cost? What are realistic ranges?
How Much Does a Failed NSPIRE Inspection Cost? The answer depends heavily on the scope of deficiencies. Minor corrections across a small property may start around several hundred dollars for basic hardware, electrical cover plates, and detector replacements. Mid-level repairs such as plumbing corrections, drywall replacement, or stair stabilization might range from several thousand to tens of thousands. Large-scale structural, roofing, or system-wide electrical upgrades can exceed that significantly. Pricing may fluctuate based on:
- Site complexity and accessibility
- Material costs and required code upgrades
- Total scope and number of affected units
Can property owners fix NSPIRE issues themselves?
Some minor items – such as installing missing switch plates, replacing door hardware, or installing battery-backed smoke alarms per manufacturer instructions – may be manageable for experienced property staff. However, electrical panel upgrades, structural framing repairs, plumbing modifications, and fire alarm system work typically require licensed professionals and sometimes permits. HUD inspectors look beyond appearance. If wiring is improperly terminated or a handrail lacks required anchoring into framing members, the deficiency will remain. We’ve seen well-intentioned maintenance teams install GFCI outlets without verifying line/load configuration, resulting in continued code violations. DIY work can also create liability if it does not comply with NFPA 70 or local building codes. When life-safety systems are involved, professional oversight is strongly recommended.
What warning signs suggest you might fail an NSPIRE inspection?
Common warning signs include persistent moisture stains on ceilings, peeling paint near plumbing fixtures, loose or wobbly handrails, missing GFCI protection in kitchens and bathrooms, cracked electrical cover plates, and inoperable smoke or carbon monoxide alarms. Exterior trip hazards, damaged guardrails, and deteriorated stair treads also attract inspection attention. We advise conducting periodic walkthroughs using a standardized checklist aligned with HUD’s NSPIRE criteria. Test smoke alarms monthly, verify GFCI functionality with a receptacle tester, and confirm that doors latch securely. Addressing minor defects early prevents them from escalating into structural or safety violations. Consistent maintenance documentation also demonstrates due diligence if questions arise during inspection.
What are the most common reasons properties fail NSPIRE inspections?
The most frequent failures involve life-safety systems and moisture-related damage. Inoperable smoke alarms, missing GFCI protection, exposed wiring, blocked egress paths, and deteriorated stairs or handrails are common findings. Water intrusion leading to mold-like conditions is another frequent issue. In our experience, many failures result from small, repeated oversights rather than a single catastrophic defect. For example, a leaking tub surround left unsealed allows water behind tile backer board. Over time, framing members weaken and flooring softens, triggering multiple deficiencies in one unit. Routine inspections and preventive sealing with manufacturer-approved silicone-based sealants can significantly reduce these risks. Staying proactive is far less expensive than reacting to compounded deficiencies.
What should you look for when hiring a contractor for NSPIRE repairs?
Look for contractors familiar with HUD’s NSPIRE standards and nationally recognized codes such as NFPA 70 and NFPA 72. Verify appropriate licensing for electrical, plumbing, or structural work and request proof of liability insurance and workers’ compensation coverage. Ask how they document repairs and whether they provide photo logs and permit records. A qualified professional should explain why a repair method meets code, not just offer a price. We recommend obtaining detailed written scopes rather than lump-sum verbal estimates. Clear scopes prevent disputes and ensure all cited deficiencies are addressed before reinspection.
What should you do immediately after receiving a failed NSPIRE report?
Start by reviewing the report carefully and categorizing deficiencies by severity. Address any life-threatening items first, especially those involving fire safety, exposed electrical conductors, or structural instability. Secure hazardous areas if needed to protect residents while repairs are scheduled. Next, gather bids from qualified professionals and develop a written remediation plan. Document every correction with photos and receipts. This service is not typically emergency-based, but ignoring urgent safety items can create liability exposure and delay subsidy payments. Schedule professional assistance promptly to avoid compressed timelines that increase labor costs and risk repeat failure.